As a developer, you are probably doing so many types of tests (probably not 😅) into your code like Unit Testing, UI tests, and more. Most of the time, stress testing is ignored in a sprint or release process. After all, if the system is working under functional testing, it’s good to go, right? ️

Load testing is a type of performance test that checks how systems function under a heavy number of concurrent virtual users performing transactions over a certain period of time.
Why? When it comes to high traffic, most applications become slow. When it slows down, customers tend to lose interest if it is performing poorly with crashes or delayed load time. Time is money, isn’t it?
Here is where Locust.io comes to the rescue. Locust is Open-source Python-based load testing. All you need is to write a script using the locust library. It’s very simple and easy-to-use which for me as a Python beginner is easier to understand.
So Why Locust?
- Define user behaviour in code
- No Cluttered UI. Just a plain code structure
- Clean load testing tool unlike JMeter
- Distributed and Scalable load testing
- VCS and Resource friendly
- Easier for beginners who don’t know python
Here is the sample code of a simple locust setup

Setup Environment
Let do the python installation.
MacOS — http://bit.ly/2XtUdae
Windows — http://bit.ly/2LD55zQ
Linux — http://bit.ly/3nCMAbW
These guides go over the proper installation of Python for development purposes, as well as setuptools, pip, and virtualenv.
I would recommend using PyCharm Jetbrain. It already has a built-in virtual environment for each project.
Installing Virtual Environment
python3 -m pip install virtualenv
Every time you create a Python project, run the following command
python3 -m venv venv
A venv folder will be created. Now, to activate virtual env, run the following command
source venv/bin/activate
And it should show (venv) at the first command indicating you are already in the virtual environment
(venv) ➜ Locust git:(master)
Installation
Let’s start with creating a project folder named locust-project.
mkdir locust-project
cd locust-project
Now activate the virtual environment
python3 -m venv venv
source venv/bin/activate
Install Locust
pip3 install locust && locust -V
If something is not right or an error occurred, please refer to the locust wiki or Google the error keyword. It works every time.
Create Load Test Script
Now, create the main file called locustfile.py in the locust-project.
Import locust library
from locust import HttpUser, between, task
Write a class that extends the HttpUser class. Can be a name based on your preference.
class ApiUser(HttpUser):
    wait_time = between(2, 5)
The behaviour of a simulated user is represented by a class in your locust file. When you start a test run, Locust will create an instance of the ApiUser class for each concurrent user.
The wait_time method is an optional feature used to make a simulated real user wait a specified time between task executions. between(2,5) indicates that Locust will wait 2–5 seconds before proceeding with each task.
Now, create several tasks based on your preferences. For example, using the API to get the profile and todo list.
@task(1)
def profile(self):
    self.client.get('/profile')
@task(5)
def get_todo_list(self):
   self.client.get('/todo')
Methods decorated with @task are the core of your locust file. For every running user, Locust creates a greenlet micro-thread, that will call those methods. Tasks are picked at random, but you can give them different weights. The above configuration will make Locust users 5x likelier to pick get_todo_list than profile. By default, it will equally call between the tasks.
How about user login?
Locust provides on_start and on_stop functions. A user will call its on_start method when it starts running, and its on_stop method when it stops running. Usually, the login part is the first checkpoint before using other endpoints.
def on_start(self):
    self.client.post("/login", {
        "username":"admin",
        "password":"admin1234"
    })
def on_stop(self):
    logging.info("On Stop Triggered")
And finally, the code would be something like this
from locust import HttpUser, between, task
class ApiUser(HttpUser):
    wait_time = between(2, 5)
    def on_start(self):
        self.client.post("/login", {
            "username":"admin",
            "password":"admin1234"
        })
    @task(1)
    def profile(self):
        self.client.get('/profile')
    @task(5)
    def get_todo_list(self):
        self.client.get('/todo')
    def on_stop(self):
        logging.info("On Stop Triggered")
In Locust, you can separate the task into another class. Let’s create a class MyTasks on top of ApiUser
class MyTasks(TaskSet):
    @task(1)
    def profile(self):
        self.client.get('/profile')
    @task(5)
    def get_todo_list(self):
        self.client.get('/todo')


class ApiUser(HttpUser):
    wait_time = between(2, 5)
    def on_start(self):
        self.client.post("/login", {
            "username":"admin",
            "password":"admin1234"
        })
    tasks = {MyTasks}
Finally, Let’s Stress It
Let’s test it by running the below command
Running Locust in Local
locust
Note that if you are using something other than locustfile.py, you need to put -f filename.py
locust -f filename.py
You will see something like this in your terminal
[2021-01-12 13:12:27,155] Kapalbiru88.local/INFO/locust.main: Starting web interface at http://0.0.0.0:8089 (accepting connections from all network interfaces)
[2021-01-12 13:12:27,164] Kapalbiru88.local/INFO/locust.main: Starting Locust 1.4.1
Your code will be able to run and you should see the below interface if you open up the browser with the http://localhost:8089 . Fill up the configuration below and start swarming!
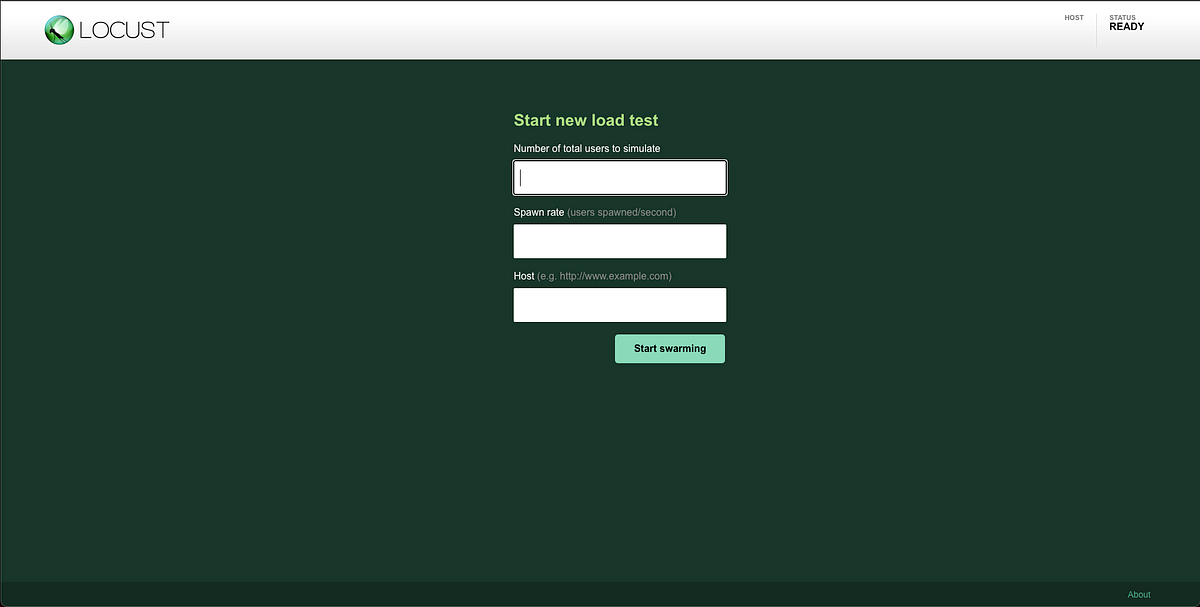
All you need is to fill the input fields with anything based on your preferences
Number of total user — How many users you want to simulate
Spawn rate — How many users will be spawned every second until the total number of users is reached
Host — What is your targeted endpoint
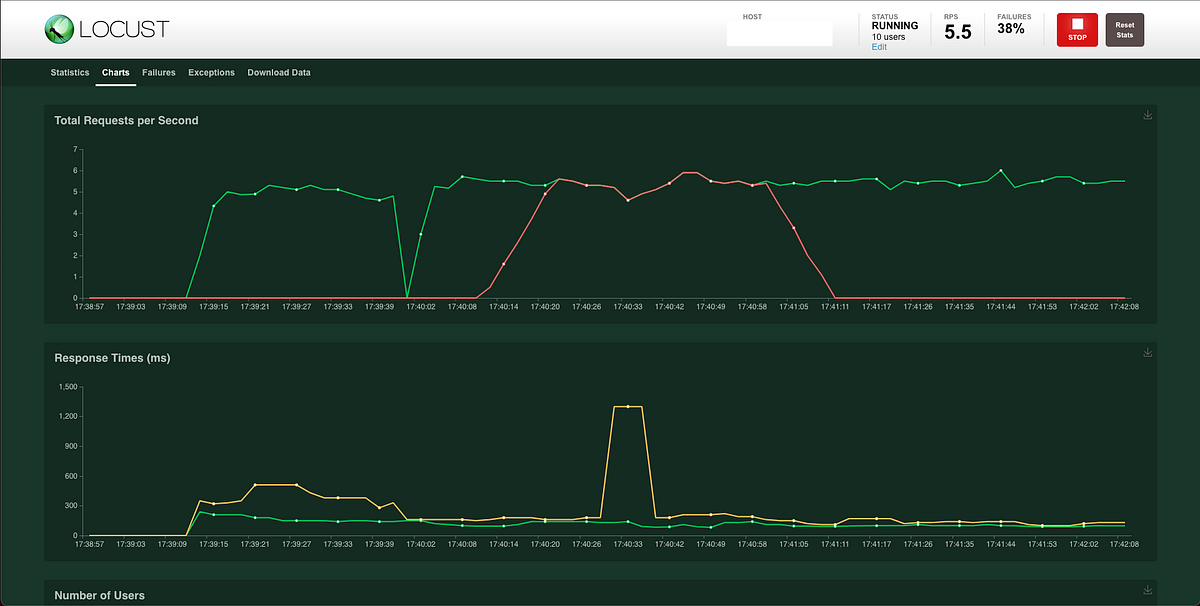
Once you start, you will notice that the page redirects to a different interface, similar to the one below
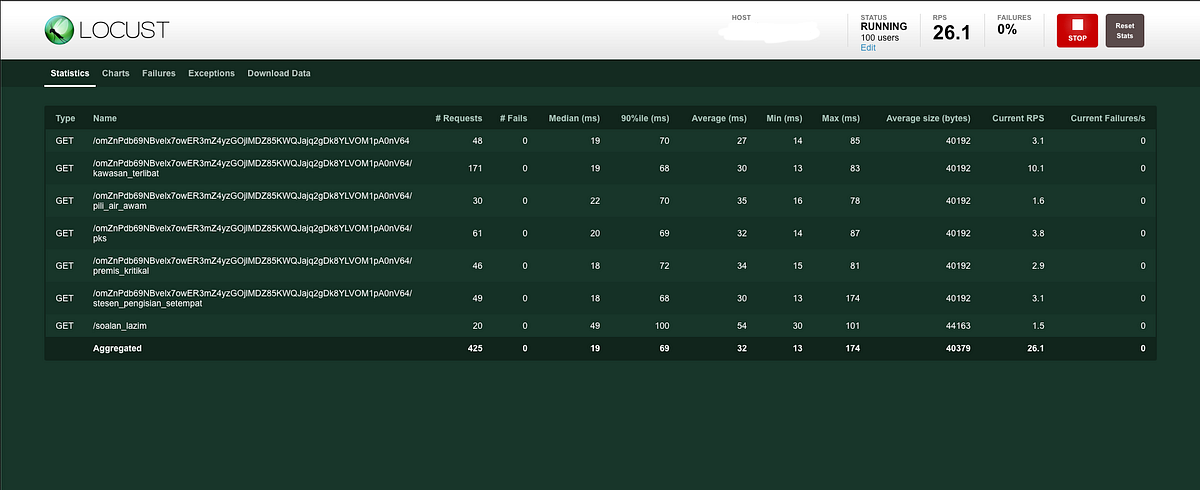
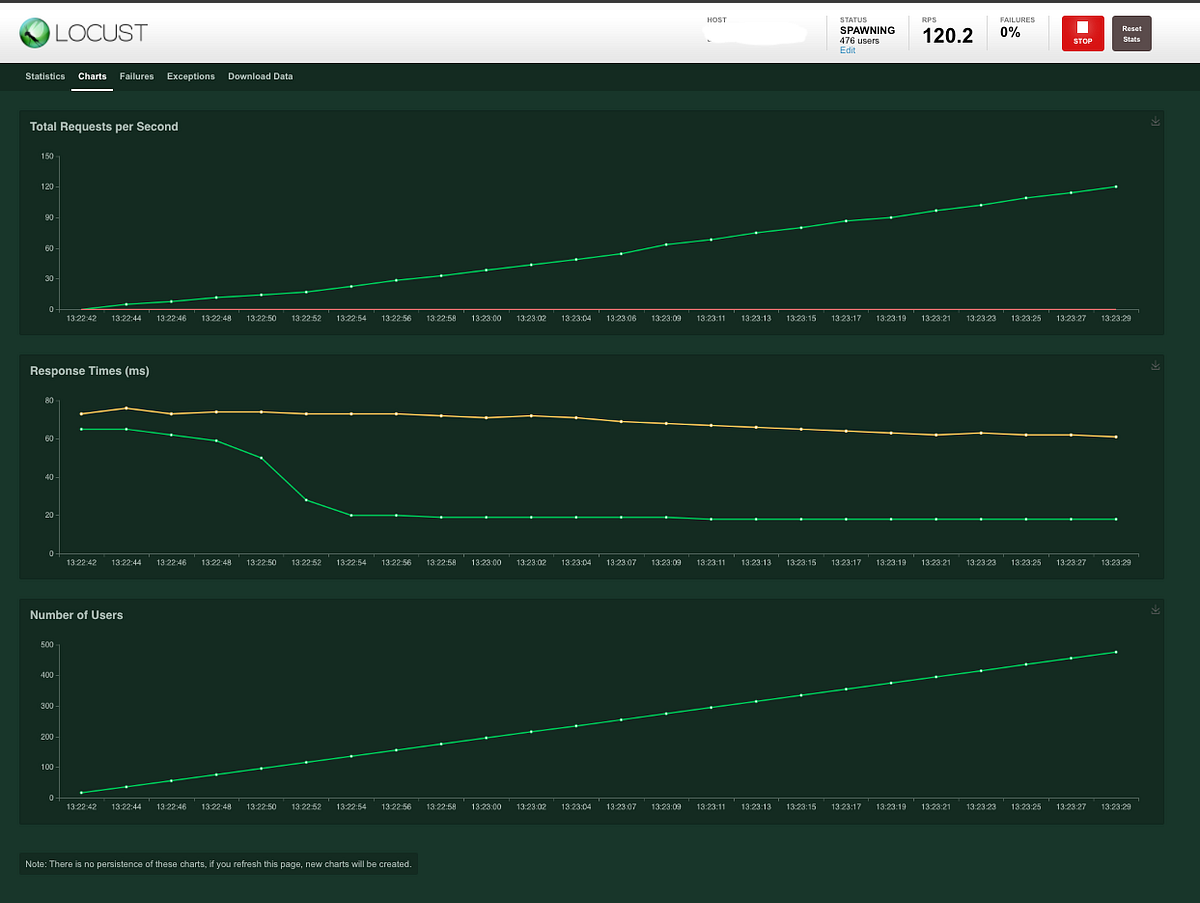
You can see statistics for every endpoint, total requests, media response, response percentile, and RPS. Locust also provides graphs with the statistic of the total request per second, response time, and the increment of the number of users.
Extras
Web Authenticate
If you want to restrict access from an unknown user, you can use --web-auth=username:password in the locust argument.
# locust --web-auth=admin:admin
Running Locust distributed
Once a single machine isn’t enough to simulate the number of users that you need, Locust supports running load tests distributed across multiple machines.
# locust --master --master-bind-port=1234 --master-bind-host=X.X.X.X The master command is only for a web interface. Even you start swarming, it won’t work because the slave is not running yet. Let’s say we run 4 workers:
# locust --worker--master-host=X.X.X.X --master-port=1234 &locust --worker--master-host=X.X.X.X --master-port=1234 &locust --worker--master-host=X.X.X.X --master-port=1234 &locust --worker--master-host=X.X.X.X --master-port=1234
It’s recommended that you start a number of simulated users that are greater than number of user classes * number of workers when running Locust distributed.
Conclusion
I found Locust to be amazing, easy to use, and supportive of REST API testing out of the box. This tutorial is just the tip of the iceberg. Find out more from the references below.
So that’s it. If you found this useful, do share with your friends or colleagues. Thanks for your time!
References:
https://docs.locust.io/en/stable/what-is-locust.html
https://blog.gojekengineering.com/a-guide-to-load-testing-via-locust-8539e7987b73
More content at plainenglish.io