Traditional username or email and password are highly unpopular among online users nowadays because you need to remember your credentials. Now, users are more prefer to use one-click social media logins through Facebook, Google, Twitter and etc. If you are application user, you will see “Login with Facebook”, “Login with Google” almost everywhere.
During the hype of NFT nowadays, i find out there is another one-click login method using blockchain technology called Web3.js and Metamask. MetaMask is a browser plugin which serves as an Ethereum wallet and allow to interact decentralized apps (dApps). For long short story specifically, with the technology of Web3.js, we can authenticate to Metamask account and serve as your online identity.
Hence, for this article, i will show your how to create one-click authentication using Web3.js and Metamask in Laravel. Please note that while we will be using Metamask Ethereum blockchain.

Lets get started
The flow principles are the same as any another social media authentication:-
- Click “Login with Metamask”
- Fetch nonce from backend server and sign the message using Web3.js
- Verify the signature in backend side
For this tutorial, i will using TALL stack with Laravel Jetstream package since the package already have Fortify authentication part.
First, we need to install web3js using NPM
> npm install web3
and import the package inside the app.js file
....
....
import Web3 from 'web3/dist/web3.min.js'
window.Web3 = Web3;
Compile it and we good to go…
Step 1: Add Login Button
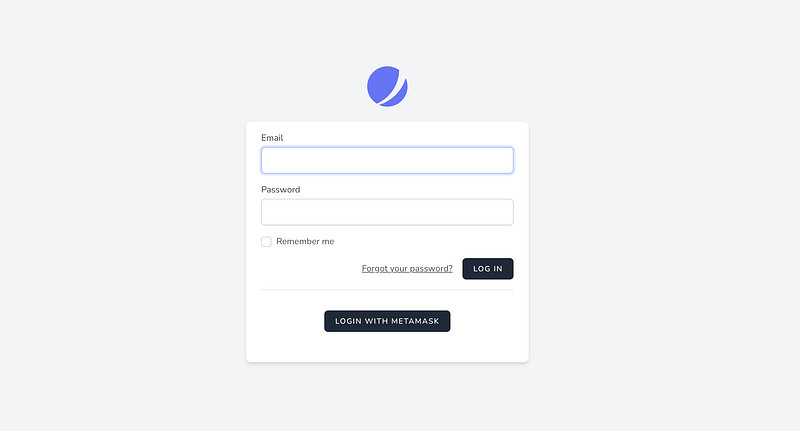
Firstly, we need to add “Login With Metamask” button somewhere. Find and edit login blade file (login.blade.php). Let’s say we put below the traditional form and wrap the button with div.
Since we need to trigger Web3JS script from this button, we need to initialize alpineJs reactive component (x-data) to the button parent. Add click event to the button with async function. We can start by connecting Web3Js to Ethereum network.
const web3 = new Web3(window.ethereum);
I think you might need to check whether the client browser has install the Metamask or not by simple check window.ethereum is undefined or not
if(!window.ehtereum) {
    alert('Metamask not exist');
    return;
}
The code sample will look like below,
and ideally, after adding button, it will look like below,
Step 2: Alter Existing User Model
After add a button to the login page, we need to alter the current User model and add a new column where we can store the wallet address. So, lets create migration file,
> php artisan make:migration alter_user_table --table=users
Edit the migration file and a column name eth_address or any desire column name. Please make sure its nullable if you wish not everyone have it.
class AlterUsersTableAddEthAddress extends Migration
{
    /**
     * Run the migrations.
     *
     * @return void
     */
    public function up()
    {
        Schema::table('users', function (Blueprint $table) {
            $table->string('eth_address')->index()->nullable();
        });
    }

    /**
     * Reverse the migrations.
     *
     * @return void
     */
    public function down()
    {
        Schema::table('users', function (Blueprint $table) {
            $table->dropColumn('eth_address');
        });
    }
}
After finish editing, just run php artisan migrate to migrate the column. Verify with your DB client if it’s successfully migrate or not.
Step 3: Create routes and controller
Now, create a controller with 2 function:- authenticate and signature
class Web3AuthController
{
     public function authenticate() {}

     public function signature() {}
}
and for the routes, since we use fortify routing, we can copy the routing style
You can see that, i put extra limiter for authenticate route just incase to avoid multiple attempt for same wallet address. You might alter fortify.php file and add extra config there. Also there, please add guest middleware which only allow guest user to access.
Step 4: Generate random message nonce
For security reason, to prevent the user from logging in again with the same signature, we need to create an API to fetch random nonce from the backend site. So the idea is where we generate 8 digit code and store in the session. Front-end will sign the message using generated code.
Create an nonce generator
We need to create a readable message where user can understand what are they signing. From the message nonce, we can put the generated code just for reference
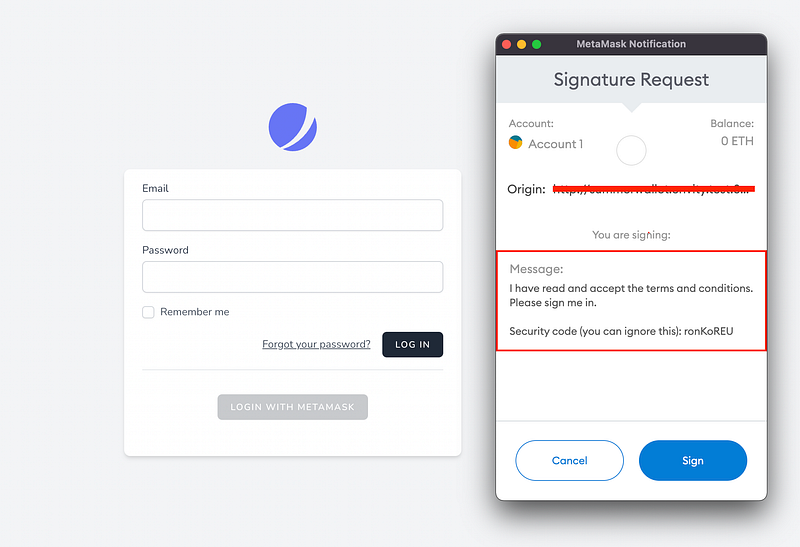
So, let’s alter the signature function and filled it like below
Fetch in front end
After that, back to the button we created earlier, add an axios request to fetch the generated message nonce.
Alter alpineJs reactive component x-data and add a variable called loginSignatureUrl which indicate the signature route.
x-data="{
   loading: false,
   loginSignatureUrl: '{{ route('metamask.signature') }}'
}"
And call the route inside async function at “Login with Metamask” button.
const message = (await axios.get(loginSignatureUrl)).data;
By now, you might need to log the http request whether the message is retrievable or not.
Step 5: Sign message
After successfully create a nonce message, we need to sign the message into unique signature token. It can be done by using web3 sign function,
const signature = await web3.eth.personal.sign(message, WALLET_ADDRESS);
For the first argument, please do note that web3.personal.sign only accept a hexadecimal representation of the string.
For the second argument, it needs a wallet address. So, we need to fetch the current address by simple fetch the accounts related from Metamask
const address = (await web3.eth.requestAccounts())[0];
Because of requestAccounts return many addresses, just pick the first one which indicate the selected account. Now we can replace WALLET_ADDRESS with the variable address.
After we successfully fetch address and signature, it’s the time for the Backend to verify whether the signature is valid or not by sending our address as well as the signature of the message the user just signed.
Add an authenticate URL and redirect URL in x-data component.
x-data="{
   loading: false,
   loginSignatureUrl: '{{ route('metamask.signature') }}',
   loginUrl: '{{ route('metamask.authenticate') }}',
   redirectUrl : '/dashboard',
}"
Using POST request, If the verification request is successful, it will redirect to assigned path in redirectUrl
try {
   let response = await axios.post(loginUrl, {
       'address': address,
       'signature': signature,
   });
   window.location.href = redirectUrl;
} catch(e) {
   alert(e.message)
}
The complete front-end code snippet will look like this,
Step 6: Signature Verification
Now for the signature verification. We have the signature and address sent to the backend. Now we need to:
- Generate back the same message with the current nonce from session
- Extracting the address and verify the signature
- Check if the address exist in the database
- Remove nonce
- Redirect to main page if success
Because of we unable to use web3 ecRecover method in PHP, we need to install 2 dependencies which is functionally equivalent to ecRecover which returns the signing address of a message + signature.
- Keccak Algorithm
- Elliptic Curve Cryptography
Before installing, those dependencies require GMP extension. You may run apt install php8.0-gmp or install using homebrew
composer require kornrunner/keccak
composer require simplito/elliptic-php
Lets get started:-
In authenticate function, fetch nonce from the session and reconstruct the message again.
public function authenticate(Request $request)
{
    $nonce = session()->get('metamask-nonce');
    $message = $this->getSignatureMessage($nonce);

    //
}
Now, we need to extracting the address from the signature and verify the signature with the address. We can just refer to the https://github.com/simplito/elliptic-php#verifying-ethereum-signature
Create an private method and copy paste the algorithm,
After that, back to the authenticate function, include the method and pass the related parameter
public function authenticate(Request $request)
{
    $nonce = session()->get('metamask-nonce');
    $message = $this->getSignatureMessage($nonce);

    $this->verifySignature(
          $message,
          $request->signature,
          $request->address
    );
}
If there is unmatched signature, the code will throw an exception. You may adjust the code suits to your needs. If there is no error, may proceed to cross check to the DB whether address is associate to any user.
$user = User::query()
           ->where('eth_address', $request->address)
           ->firstOrFail();
If exist, we can immediately authenticate the session for that user,
auth()->login($user);
Remove the nonce from the session to avoid tampering with same signature
session()->forget('metamask-nonce');Here is full snippet of the code
And now we have fully functional “Login with Metamask”. You should now be redirected to the redirectUrl if everything is fine.
Done~~~ 🤘
Conclusion
This flow might not as famous as Social media login. But, it might be helpful for some who might want to integrate with it. If you guys have any questions, feel free to comment.
References
Found this helpful?
If this article saved you time or solved a problem, consider supporting — it helps keep the writing going.
Originally published on Medium.
View on Medium