Nowadays, there is a lot of application moving from traditional email/password to phone number/password as the main authentication. It is because the OTP method we could say it much more secure than email verification. Hence, the phone number has been the one of authentication ID to access sensitive information. In such situations, it’s vital for the system to verify that the phone numbers are valid and functional.
How to verify the validity of phone number?
Basically, the idea is the same behaviour like email verification but instead of using verification link, we use the OTP passcode to their phones and ask them to enter the passcode.
The flow is quite straight forward,
- User register with phone number and password
- System generate random 6 digit code and sent to user mobile user via SMS gateway
- User entered the code and phone number get verified
How to implement in Laravel
Currently, Laravel already provides a seamless email verification steps which can be implemented by few lines of codes rather than forcing you to re-implement this feature by hand for each application that you created. From that approach, we can simple mimic the code and make it as mobile phone number verification.
In order to send a sms to user’s phone, you need a SMS gateway. There are tons of SMS gateway services can be subscribe like Twillio, Vonage, etc.. Yes, you need to subscribe. SMS is not free.
We will use the default sms provider by Laravel framework which is Vonage. You might want to follow the prerequisites in Laravel documentation for the installation part and configuration of the sms settings.
This tutorial would be quite long but it quite simple.
Lets get started
For easy setup, i use JetStream + Fortify package to scaffold the authentication part.
Table Migration
For existing project, you can create a new migration file and alter the table to add new column for mobile phone.
php artisan make:migration alter_users_table_add_mobile_phone --table=users
Adjust the schema and add mobile phone column with nullable type.
Schema::table('users', function($table) {
    $table->string('mobile_phone')->unique()->nullable();
    $table->string('phone_verified_at')->nullable();

    $table->integer('login_identifier')->default(1);
})
For new project, you can just adjust the default user migration file and add the column
Schema::create('users', function($table) {
   ....
   $table->string('mobile_phone')->unique()->nullable();
   $table->string('phone_verified_at')->nullable();
   $table->integer('login_identifier')->default(1);
   ....
})
We mimic same column as how email verification in Laravel currently implemented and we add another extra column called “login_identifier” because to indicate which type of login — email or mobile phone. By default, 1 is for email and 2 is for mobile phone.
Next, we need a table that store generated passcode to be use for validation. We can create a model name PinToken
> php artisan make:model PinToken -m
What we need in the PinToken table are
- Who is requesting
- When passcode is generated
- When the passcode is expired
Schema::create('pin_tokens', function (Blueprint $table) {
    $table->id();
    $table->morphs('referable');
    $table->string('passcode')->index();
    $table->dateTime('expired_at')->index();
    $table->timestamps();
});
After migration success, open the model and edit like below
class PinToken extends Model
{
    use HasFactory;

    protected $fillable = [
        'referable_id',
        'referable_type',
        'reference_type',
        'reference_token',
        'pin',
        'expired_at',
    ];

    protected $casts = [
        'expired_at' => 'datetime'
    ];

    public function referable()
    {
        return $this->morphTo();
    }

    public function isExpired()
    {
        return $this->expired_at->isPast();
    }

    public function extendExpiry($minutes = 2)
    {
        $this->update([
            'expired_at' => now()->addMinutes($minutes)
        ]);
    }
}
Now, we create a Trait to interact with PinToken model.
trait HasPinToken
{
    public function pinTokens()
    {
        return $this->morphMany(PinToken::class, 'referable')->latest();
    }

    public function createPasscode($type = null)
    {
        return $this->pinTokens()->create([
            'reference_token' => \Str::random(60),
            'pin' => mt_rand(100000, 999999),
            'expired_at' => now()->addMinutes(2),
            'reference_type' => $type ?? 'verification-passcode'
        ]);
    }
}
This trait now can be use inside User model.
Override Fortify Authentication
Behind the scene, Fortify automatically retrieve and authenticate the user based on the provided credentials and the authentication guard that is configured for your application. Thankfully, Fortify allows us to easily overwrite the authentication using the Fortify::authenticateUsing method.
Note: If you’re not using Fortify, you can read how the logic works and implement on your way
Overwrite callback
If we want to overwrite Fortify function, we need to do it at FortifyServiceProvider class inside boot method
Since we maintain the email login, we need to adjust the query to make mobile phone or email.
$user = \App\Models\User::query()
    ->where('email', $request->{Fortify::username()})
    ->orWhere('mobile_phone', $request->{Fortify::username()})
    ->first();
if (!\Hash::check($request->password, $user->password)) {
    return false;
}
Then, since we have login_identifier column, we need to update the column what is current type of authentication used
tap($user)->update([
    'login_identifier' => match ($request->{Fortify::username()}) {
        $user->email => 1,
        $user->mobile_phone => 2
    }
])
Below are the full method changes,
Add response singleton
Here is where we can mimic how Laravel handle singleton response. There are 2 singleton as we need for this to work — VerifyPhoneResponse and VerifyPhoneViewResponse. This should be handled in register method.
First, create an empty blade inside auth folder. Give a name as verify-phone.blade.php.
Then, create 2 contracts class named VerifyPhoneResponse and VerifyPhoneViewResponse.
interface VerifyPhoneResponse extends Responsable {}
interface VerifyPhoneViewResponse extends Responsable {}
Then, create a response class to handle response after verified
class VerifyPhoneResponse implements VerifyPhoneViewResponse
{
    public function toResponse($request)
    {
        return $request->wantsJson()
            ? new JsonResponse('', 204)
            : redirect()->intended('/?verified=1');
    }
}
Finally the result would be like this,
Create Traits, Contract and Notification class
Now create a contract class called MustVerifyPhone. Copy from MustVerifyEmail contract and adjust accordingly.
interface MustVerifyPhone
{
    /**
     * Determine if the user has verified their email address.
     *
     * @return bool
     */
    public function hasVerifiedPhone();

    /**
     * Mark the given user's email as verified.
     *
     * @return bool
     */
    public function markPhoneAsVerified();

    /**
     * Send the email verification notification.
     *
     * @return void
     */
    public function sendPhoneVerificationNotification();

    /**
     * Get the email address that should be used for verification.
     *
     * @return string
     */
    public function getPhoneForVerification();
}
Create a Trait class called MustVerifyPhone to handle the contract method
<?php

namespace App\Models\Traits;

use App\Helpers\Utils;
use App\Models\PinToken;
use App\Notifications\VerifyPhoneNumber;

trait MustVerifyPhone
{
    /**
     * Determine if the user has verified their mobile phone.
     *
     * @return bool
     */
    public function hasVerifiedPhone()
    {
        return ! is_null($this->phone_verified_at);
    }

    /**
     * Mark the given user's mobile phone as verified.
     *
     * @return bool
     */
    public function markPhoneAsVerified()
    {
        return $this->forceFill([
            'phone_verified_at' => $this->freshTimestamp(),
        ])->save();
    }

    /**
     * Send the mobile phone verification notification.
     *
     * @return void
     */
    public function sendPhoneVerificationNotification()
    {
        $token = $this->pinTokens()->first();

        if (!$token || $token->isExpired()) {
            $this->notify(new VerifyPhoneNumber(($token = $this->createPasscode())->pin));
        }

        return $token;
    }

    /**
     * Get the mobile phone that should be used for verification.
     *
     * @return string
     */
    public function getPhoneForVerification()
    {
        return $this->mobile_phone;
    }
/**
     * Route notifications for the Vonage channel.
     *
     * @param  \Illuminate\Notifications\Notification  $notification
     * @return string
     */
    public function routeNotificationForVonage($notification)
    {
        return $this->getPhoneForVerification();
    }
}
In order to send a SMS to the user, we need a notification function. We can simply run a command to create notification
php artisan make:notification VerifyPhoneNumber
Go to the VerifyPhoneNumber and edit the class
class VerifyPhoneNumber extends Notification
{
    use Queueable;

    private $passcode;

    /**
     * Create a new notification instance.
     *
     * @return void
     */
    public function __construct($passcode)
    {
        $this->passcode = $passcode;
    }

    /**
     * Get the notification's delivery channels.
     *
     * @param  mixed  $notifiable
     * @return array
     */
    public function via($notifiable)
    {
        return ['vonage'];
    }

    /**
     * Get the mail representation of the notification.
     *
     * @param  mixed  $notifiable
     * @return VonageMessage
     */
    public function toVonage($notifiable)
    {
        return (new VonageMessage())
            ->content(__("Your verification code is :code", [
                'code' => $this->passcode
            ]));
    }
}
Note: Please be inform that above notification class, you need to identify what is your SMS gateway you want to use and implement on your own notification channel
Create verification controller
Now, create a controller named VerifyPhoneController or any name you preferred. We need 3 methods: -
- Submit verification — where to validate the validity of the pin number. IF the verified user tried to submit, we will redirect to home page. The submission must have special string token (reference token) and the pin number sent to their mobile phone. We need the reference token to check the validity of the pin number must be match with the reference token. IF match, we need to delete it then mark as verified.
- Resend TAC passcode — where the user can request for passcode incase the SMS is not received in the certain amount of time. IF the verified user tried to request resend passcode, we will redirect to home page.
- Display verification page — where the page for user to key-in their passcode number sent to their mobile phone. IF the verified user tried to enter this page, we will redirect to home page again.
For the submission, we need to validate the incoming request. Create a request class by command
php artisan make:request VerifyPhoneRequest
The submission must have 2 value which is passcode and reference_token. Then add a method to verify the passcode either match with the reference token or already expired.
Use the VerifyPhoneRequest class to the verification method. We used request class because we want to make the controller looks clean. Below are the full snippet of code of the controller.
Create verification routes
We will need 3 routes based on our controller:-
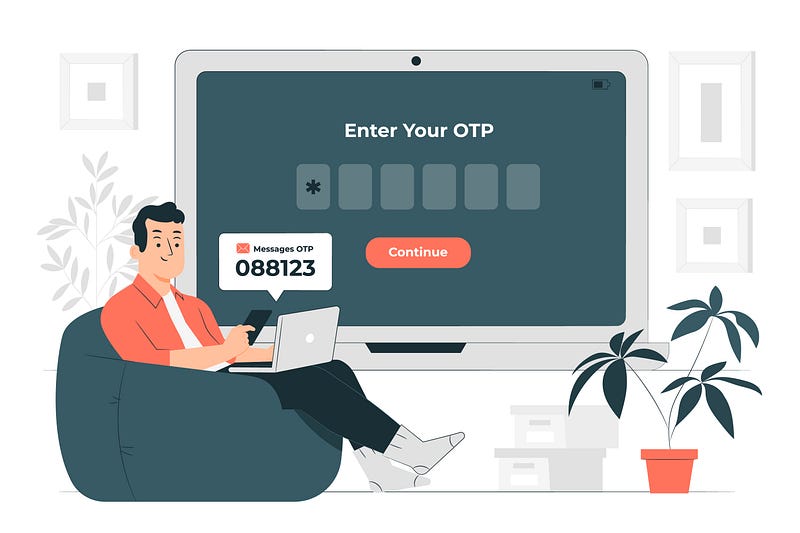
Create verification blade page view

The idea is where we need to design the verification page like above. To make it short, i already designed for you. Below are the snippet
You can replace the 6 boxes into text field if you want to. It designed just to make it cool 😎
Create a middleware
Now the finishing, to make sure the other route are protected from unverified user, we need to create a new middleware to check the status of the mobile phone.
With command
php artisan make:middleware EnsurePhoneIsVerified
The middleware is just like current used for email,
class EnsurePhoneIsVerified
{

    public function handle(Request $request, Closure $next)
    {
        if (!$request->user()) {
            abort(403);
        }

        if ($request->user()->login_identifier == 2
            && $request->user() instanceof MustVerifyPhone
            && !$request->user()->hasVerifiedPhone()) {

            return $request->expectsJson()
                ? abort(403, 'Your phone number is not verified.')
                : Redirect::guest('/');
        }

        return $next($request);
    }
}
After that, register the middleware in the Kernel.php inside $routeMiddleware
protected $routeMiddleware = [
    ...
    ...
    'verified' =>  EnsurePhoneIsVerified::class,
    ...
];
You might notice that if you’re using jetstream, “verified” already used by another. How about we combine the middleware into one.
Let’s rename the middleware EnsurePhoneIsVerified into EnsureEmailOrPhoneIsVerified
class EnsurePhoneIsVerified
{

    public function handle(Request $request, Closure $next)
    {
        if (!$request->user()) {
            abort(403);
        }
        // IF current identifier is email, this will be triggered
        if ($request->user()->login_identifier == 1
           && $request->user() instanceof MustVerifyEmail
           && !$request->user()->hasVerifiedEmail()) {

            return $request->expectsJson()
               ? abort(403, 'Your email address is not verified.')
              : Redirect::guest('/');
        }
        // IF current identifier is phone, this will be triggered
        if ($request->user()->login_identifier == 2
            && $request->user() instanceof MustVerifyPhone
            && !$request->user()->hasVerifiedPhone()) {

            return $request->expectsJson()
                ? abort(403, 'Your phone number is not verified.')
                : Redirect::guest('/');
        }

        return $next($request);
    }
}
Ok we done enough now. You can now use the middleware along with “auth” middleware for example:-
Route::middleware(['auth', 'verified'])->group(function() {....})At this point, you might be able to demo the mobile phone authentication. If you encounter any errors, may drop a comment or google it 😅. That’s all guys! Thanks for your time
References
Found this helpful?
If this article saved you time or solved a problem, consider supporting — it helps keep the writing going.
Originally published on Medium.
View on Medium