Keeping an Eye on Laravel Apps with Sentry

If you’re building web applications with Laravel, you probably already know that it’s a powerful and flexible PHP framework. But even the most well-designed apps can have issues now and then. That’s where Sentry comes in.
In this article, we’ll explore what Sentry is, why it’s a game-changer for Laravel developers and how you can set it up to keep your applications running smoothly.
What is Sentry?

Sentry is a tool designed to help developers keep track of errors and performance issues in their applications. Imagine you’re building a web application or an API and something goes wrong — a bug, an error or a performance hiccup. Instead of hunting through logs or waiting for users to report issues, Sentry provides a way to catch these problems as they happen.
Here’s what Sentry does in a nutshell:
- Error Tracking: When something goes wrong in your application, Sentry captures the error and provides detailed reports.
- Performance Monitoring: Sentry also tracks the performance of your application, helping you identify slow parts and optimise them.
- Contextual Information: It doesn’t just tell you that an error occurred; it gives you context, including the stack trace, user actions leading up to the error and environment details.
With Sentry, you get a clear view of what’s happening in your app, so you can address issues quickly and improve the overall user experience.
Why is Sentry Important in Laravel Development?
When you’re deep into software development, you’re often balancing between writing clean code and fixing unexpected bugs. That’s where Sentry steps in like a trusty sidekick, ready to catch those sneaky issues before they turn into bigger problems. Here’s why having Sentry in your Laravel can make your life a lot easier:
- Catch Errors in Real-Time: Imagine being able to see errors as soon as they happen, rather than waiting for user complaints or stumbling upon them in logs. Sentry keeps you in the loop with instant notifications whenever something goes wrong. This means you can jump on fixing issues right away, often before your users even notice.
- Get Detailed Error Reports: Ever tried to debug an issue only to find yourself sifting through vague error messages? Sentry takes the guesswork out by providing clear, detailed reports. You get everything from stack traces to the exact line of code where the error occurred. It’s like having a detailed map that guides you straight to the problem.
- Monitor Performance: Beyond just error tracking, Sentry also keeps an eye on how your application performs. It can alert you if something’s slowing down or if there are bottlenecks. This helps ensure your Laravel app runs smoothly and efficiently, giving your users a better experience.
- Understand User Impact: Sentry helps you see which errors are hitting your users the hardest. This means you can focus on fixing the issues that matter most, improving overall user satisfaction and keeping your application in top shape.
- Easy Integration: Setting up Sentry with Laravel is straightforward. It doesn’t add a lot of overhead or complexity to your project. Once it’s in place, it quietly works in the background, providing valuable insights without getting in your way.
How to Integrate Sentry with Laravel
Getting started with Sentry takes just new lines of code — no agents required. Sentry’s automatic instrumentation captures transactions and spans, making it easier to trace the root cause of any issues that occur within your application.
Prerequisites
- Basic knowledge of PHP and the Laravel framework.
- A Sentry account. Open a free account here.
- Composer: Composer is the dependency manager for the PHP
Ready to add Sentry to your Laravel project? Here’s a step-by-step guide to get you started.
1. Create a Sentry Account
First things first, you’ll need a Sentry account. Head over to Sentry and sign up. Once you’ve created an account, you can set up a new project for your Laravel application.
2. Create Project
Go to your Sentry dashboard and click on “Create Project.” Choose “Laravel” from the list of options. Once created, Sentry will generate a unique DSN for your project. You’ll need this DSN to configure your Laravel app to communicate with Sentry.
DNS format :- https://XXX@XXX.ingest.us.sentry.io/XXX
3. Install the Sentry SDK
With your account set up, it’s time to integrate Sentry with your Laravel project. The easiest way to do this is via Composer, Laravel’s package manager. Open your terminal and navigate to your project directory, then run the following command:
# composer require sentry/sentry-laravelThis will install the Sentry SDK for Laravel.
4. Install Excimer PHP Extension (Profiling Features)
Before integrating Sentry, ensure you have the PHP Excimer extension installed. This extension helps with error reporting and performance monitoring. Install it by running:
# pecl install excimerThe Excimer PHP extension supports PHP 7.2 and up. Excimer requires Linux or macOS and doesn’t support Windows. For additional ways to install Excimer, see Sentry documentation.
5. Configure Sentry SDK
Now that the Sentry package is installed, you need to configure it. You can configure the Sentry DSN with this command:
# php artisan sentry:publish --dsn=YOUR_DSN_REPLACE_MEIt creates the config file (config/sentry.php) and adds the DSN to your .env file where you can add further configuration options:
SENTRY_LARAVEL_DSN=YOUR_DSN_REPLACE_ME
# Specify a fixed sample rate
SENTRY_TRACES_SAMPLE_RATE=1.0
# Set a sampling rate for profiling - this is relative to traces_sample_rate
SENTRY_PROFILES_SAMPLE_RATE=1.0
For sentry.php configuration setup, I would recommend to turn on everything except missing routes tracing for better analytics and tracking
6. Set Up Error Reporting
Next, we need to register the Sentry Integration reporting module.
For Laravel 10, go to the Handler.php insde the Exceptions folder
For Laravel 11, go to app.php inside bootstrap folder
Laravel 10
public function register(): void
{
    $this->reportable(function (Throwable $e): void {
        if (config('sentry.dsn') && app()->bound('sentry') && ! app()->isLocal()) {
            app('sentry')->captureException($e);
        }
    });
}
For Laravel 11
return Application::configure(basePath: dirname(__DIR__))
    ->withRouting(
        web: __DIR__.'/../routes/web.php',
        commands: __DIR__.'/../routes/console.php',
        health: '/up',
    )
    ->withMiddleware(function (Middleware $middleware) {
        //
    })
    ->withExceptions(function (Exceptions $exceptions) {
        if (config('sentry.dsn') && app()->bound('sentry') && ! app()->isLocal()) {
            Integration::handles($exceptions); // <----- HERE
        }
    })->create();
In the code block above, we are defining a custom exception-handling function in our Laravel application, which will capture any unhandled exceptions and send them to Sentry using the app('sentry')->captureException($e) method. The app()->bound('sentry') check ensures that the Sentry service is available and registered in the application before trying to capture the exception.
If you notice, i put ! app()->isLocal() as i don’t want to record my local machine traffic since it will consume the sentry usage. You may remove it as you want to.
7. Test Your Setup
Finally, test your Sentry integration to make sure everything is working as expected. Trigger a fake error in your Laravel application and check your Sentry dashboard to see if the error appears by running this command:-
# php artisan sentry:test

DSN discovered from Laravel config or `.env` file!
Sending test event...
Test event sent with ID: XXXXXXXX
Refresh your sentry dashboard and you will see like below screenshot
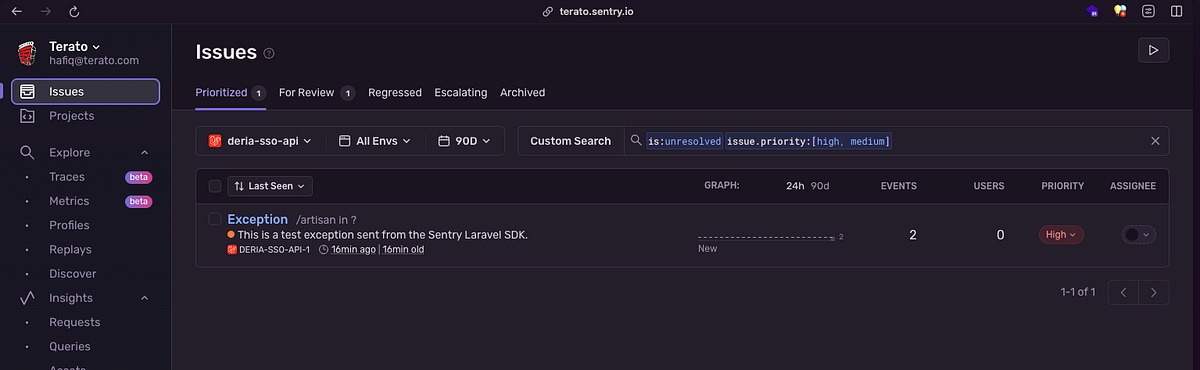
This will confirm that Sentry is capturing and reporting issues correctly.
With all these steps, you’ll have Sentry up and running in your Laravel project, ready to help you keep track of errors and performance issues.
Sentry Problem: Aware of Performance Impact 💥
While Sentry provides valuable error tracking and performance monitoring, it’s important to be aware of potential performance issues if Sentry’s service is down or unavailable. If Sentry is unreachable, it could slow down your application as it tries to send data to an unavailable host.
To avoid performance issues related to Sentry downtime, consider using Sentry Relay. Relay acts as a middleman between your application and Sentry, handling and buffering events more efficiently. It also provides a local caching mechanism, so if Sentry is temporarily unavailable, Relay can queue the events and send them once the connection is restored.
To set up Relay, follow the official Sentry Relay documentation for installation and configuration instructions. Relay can be run on your infrastructure or a cloud service and it helps ensure that Sentry integration does not negatively impact your application’s performance.
Extras Sentry Features Benefits You in Laravel Development
Performance Monitoring
To enable Sentry’s performance monitoring features, you’ll need to configure the SDK to capture performance data.
In your config/sentry.php file, ensure that performance monitoring is enabled:
'traces_sample_rate' => env('SENTRY_TRACES_SAMPLE_RATE', 1.0),In your .env file, set the SENTRY_TRACES_SAMPLE_RATE to a value between 0 and 1 to control the sample rate. For example:
SENTRY_TRACES_SAMPLE_RATE=1.0This setting determines the percentage of requests to capture for performance monitoring.
Profiling Monitoring
With profiling, Sentry allows you to collect and analyze performance profiles from real users in production to give you a complete picture of how your application performs in a variety of environments.
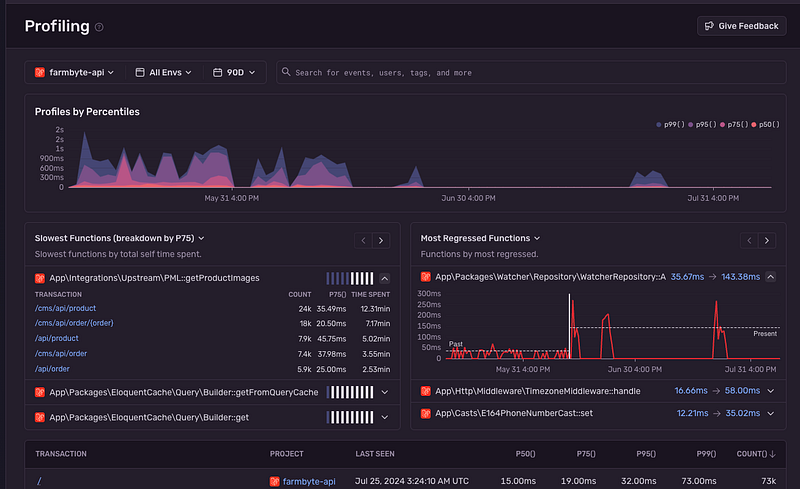
To enable Sentry’s profiling monitoring features, you’ll need to configure the SDK to capture performance data. In your config/sentry.php file, ensure that performance monitoring is enabled:
'profiles_sample_rate' => env('SENTRY_PROFILES_SAMPLE_RATE', 1.0),In your .env file, set the SENTRY_TRACES_SAMPLE_RATE to a value between 0 and 1 to control the sample rate. For example:
SENTRY_PROFILES_SAMPLE_RATE=1.0This setting determines the percentage of requests to capture for performance monitoring.
Laravel Storage Disk Tracing
You might want to trace your cloud storage or local storage how their performance that would impact your system. You can enable this feature by wrapping the configuration for all disks with a call to Sentry\Laravel\Features\Storage\Integration::configureDisks()
Here are the example if you want to trace and profile your file storage :-
's3' => Sentry\Laravel\Features\Storage\Integration::configureDisk('s3', [
    'driver' => 's3',
    'key' => env('AWS_ACCESS_KEY_ID'),
    'secret' => env('AWS_SECRET_ACCESS_KEY'),
    'region' => env('AWS_DEFAULT_REGION'),
    'bucket' => env('AWS_BUCKET'),
    'url' => env('AWS_URL'),
    'endpoint' => env('AWS_ENDPOINT'),
    'use_path_style_endpoint' => env('AWS_USE_PATH_STYLE_ENDPOINT', false),
    'throw' => false,
]),
Record Affected User in Tracing
To enhance your error and performance data with user context, you can set up a custom function that adds user information to your events. This can help you understand which users are affected by specific issues.

First, create a resolver class to handle this:
namespace App\Resolvers\Sentry;

use Sentry;

class BeforeSendResolver
{
    public static function beforeSend(\Sentry\Event $event, ?\Sentry\EventHint $hint): ?\Sentry\Event
    {
        $event->setUser(new \Sentry\UserDataBag(
            auth()->id(),
            auth()->user()->email ?? null,
            request()->ip(),
        ));

        return $event;
    }
}
Then, update your config/sentry.php to use this resolver:
'before_send' => [\App\Resolvers\Sentry\BeforeSendResolver::class, 'beforeSend'],This configuration ensures that every event sent to Sentry includes user details, providing more context for debugging.
Conclusion
Adding Sentry to your Laravel development workflow can be a game-changer. It offers real-time error tracking, detailed reports and performance monitoring that help you keep your application running smoothly. By integrating Sentry, you’ll be able to address issues swiftly, improve your app’s performance and enhance the overall user experience.
With Sentry’s easy setup and powerful features, you’ll have a reliable partner in your development journey, helping you spot and fix problems before they become major headaches. So go ahead, give it a try and let Sentry help you keep your Laravel app in tip-top shape!
Feel free to drop any questions or share your experiences with Sentry and Laravel in the comments below. Happy coding!
If you found this article insightful and want to stay updated with more content on system design and technology trends, be sure to follow me on :-
Twitter: https://twitter.com/hafiqdotcom
LinkedIn: https://www.linkedin.com/in/hafiq93
Buy Me Coffee: https://paypal.me/mhi9388 /
https://buymeacoffee.com/mhitech