How each approach works, what it protects against, and when to reach for which one.
Most developers treat password reset as a checkbox. User clicks “Forgot Password”, they get a link, they set a new password. Done. The implementation barely gets a second thought.
Then a user gets locked out because their link expired in ten minutes, or a security researcher finds that your reset tokens are stored in plaintext, or you discover that your “Host” header is being injected into the reset URL you are sending to users. Simple feature. Lots of ways to get it wrong.
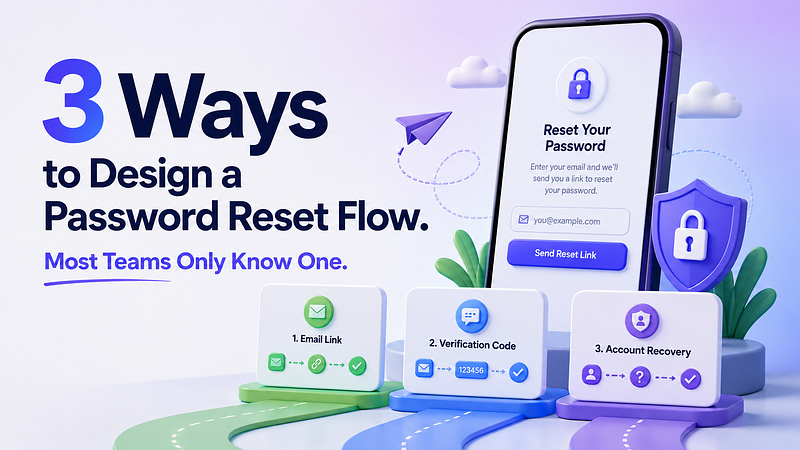
There are three distinct ways to design a password reset flow. They have different security properties, different operational tradeoffs, and different contexts where they make sense. This article covers all three, with enough implementation detail to actually build each one.
The shared foundation every approach needs
Before getting into the specific designs, three rules apply to all of them.
Return the same response whether the email exists or not. If your endpoint returns “email not found” for unknown addresses and “reset link sent” for valid ones, you have just built an account enumeration endpoint. An attacker can probe your user base by sending reset requests. The OWASP Forgot Password Cheat Sheet is explicit on this: return a consistent message for both existent and non-existent accounts. It also notes that responses should return in consistent time: a quick return for unknown emails and a slow one for valid emails still leaks information through timing.
Never build the reset URL from the Host header. This is a Host Header Injection attack, and password reset is one of its most common targets. An attacker sends a reset request with a manipulated Host header pointing to their domain. Your application builds the URL using that header and mails it to the user. The user clicks a link that goes to the attacker’s server, carrying their reset token. The fix: hard-code the base URL in your config, or validate it against a list of trusted domains. Never pass request()->host() into a reset URL.
Set Referrer-Policy: no-referrer on your reset page. When a user arrives at your reset page from an email link, the token is in the URL. If the page loads any third-party resource (analytics, fonts, anything) the browser may send the full URL as a Referer header to that third party. One policy directive prevents this entirely.
Approach 1: The database-backed URL token
This is the approach most frameworks ship, including Laravel. It is stateful, simple to reason about, and gives you full control over token revocation.
How it works. When the user submits their email, you generate a cryptographically secure random token, store a hash of it in the database alongside the user ID and an expiry timestamp, then send the raw token to the user via email as a URL parameter. When the user clicks the link, you hash the incoming token, look it up in the database, check the expiry, and if everything matches you let them set a new password.
The token the user receives in the email and the token in your database are never the same value. What you store is the hash. This means that a database breach does not give an attacker usable tokens; they would need the raw token from the email, not the hash.
Token requirements:
- Generated by a cryptographically secure RNG (not
rand(), notuniqid()) - At least 64 characters of raw entropy
- Single-use: delete the row on successful redemption
- Expire after the window you set (more on the right window below)
Here is the full flow in Laravel using the built-in Password facade. Laravel generates the token internally with hash_hmac('sha256', Str::random(40), $this->hashKey), stores the hashed form in the password_reset_tokens table, and handles expiry checks automatically:
// Step 1: handle the reset link request
use Illuminate\Http\Request;
use Illuminate\Support\Facades\Password;

Route::post('/forgot-password', function (Request $request) {
    $request->validate(['email' => 'required|email']);
    // Returns same status string for both found and not-found emails
    $status = Password::sendResetLink(
        $request->only('email')
    );
    return $status === Password::ResetLinkSent
        ? back()->with(['status' => __($status)])
        : back()->withErrors(['email' => __($status)]);
})->middleware('guest')->name('password.email');
// Step 2: handle the actual password reset
use App\Models\User;
use Illuminate\Auth\Events\PasswordReset;
use Illuminate\Http\Request;
use Illuminate\Support\Facades\Hash;
use Illuminate\Support\Facades\Password;
use Illuminate\Support\Str;
Route::post('/reset-password', function (Request $request) {
$request->validate([
'token' => 'required',
'email' => 'required|email',
'password' => 'required|min:8|confirmed',
]);
$status = Password::reset(
$request->only('email', 'password', 'password_confirmation', 'token'),
function (User $user, string $password) {
$user->forceFill([
'password' => Hash::make($password),
])->setRememberToken(Str::random(60));
$user->save();
event(new PasswordReset($user));
}
);
return $status === Password::PasswordReset
? redirect()->route('login')->with('status', __($status))
: back()->withErrors(['email' => [__($status)]]);
})->middleware('guest')->name('password.update');Configure expiry and throttle in config/auth.php:
'passwords' => [
    'users' => [
        'provider' => 'users',
        'table'    => 'password_reset_tokens',
        'expire'   => 15,   // minutes — see expiry section below
        'throttle' => 60,   // seconds between requests per user
    ],
],
Expired tokens accumulate in the database. Schedule the cleanup command:
// In app/Console/Kernel.php or routes/console.php
Schedule::command('auth:clear-resets')->everyFifteenMinutes();
When to use it. This is the right approach for most web applications. It is well-understood, easy to audit, gives you server-side revocation, and any developer joining your team will recognise it immediately.
Approach 2: The HMAC-signed stateless URL
The database-backed approach has one operational cost: a table write on every reset request, and a table read on every link click. In a distributed system with multiple application servers, the token table becomes shared state that every node must reach. The HMAC-signed URL removes that dependency.
How it works. Instead of storing a token, you embed all the information you need (user ID, expiry timestamp) directly in the URL, and sign the whole thing with an HMAC using a server-side secret key. When the user clicks the link, you recompute the signature from the URL parameters. If it matches, the link is valid. No database lookup required.
The security guarantee comes from the HMAC: an attacker cannot forge a valid URL without the secret key, and cannot modify the expiry timestamp without invalidating the signature.
The limitation is revocation. Once issued, you cannot cancel a stateless URL unless you maintain a denylist, which re-introduces database state. For most use cases this is acceptable. For high-security contexts where you need to immediately invalidate a sent link, use Approach 1.
// HMAC-signed URL generation (TypeScript/Node — same concept applies in any language)
import * as crypto from 'crypto';

const SECRET_KEY = process.env.RESET_HMAC_SECRET!;
function generateResetUrl(userId: string, email: string): string {
    const expiry = Math.floor(Date.now() / 1000) + 15 * 60; // 15 minutes
    const payload = `${userId}:${email}:${expiry}`;
    const signature = crypto
        .createHmac('sha256', SECRET_KEY)
        .update(payload)
        .digest('hex');
    const params = new URLSearchParams({ userId, email, expiry: String(expiry), sig: signature });
    return `https://example.com/reset-password?${params.toString()}`;
}

function verifyResetUrl(params: URLSearchParams): { valid: boolean; userId?: string } {
    const userId = params.get('userId')!;
    const email = params.get('email')!;
    const expiry = Number(params.get('expiry'));
    const sig = params.get('sig')!;

    // Check expiry before signature to avoid unnecessary crypto work
    if (Math.floor(Date.now() / 1000) > expiry) {
        return { valid: false };
    }

    const payload = `${userId}:${email}:${expiry}`;
    const expected = crypto
        .createHmac('sha256', SECRET_KEY)
        .update(payload)
        .digest('hex');

    // Timing-safe comparison prevents timing attacks
    const valid = crypto.timingSafeEqual(Buffer.from(sig), Buffer.from(expected));
    return { valid, userId: valid ? userId : undefined };
}
Two details matter here. First, crypto.timingSafeEqual: a standard string comparison leaks information through execution time. Use a constant-time comparison function in any language. Second, include the email in the signed payload. Without it, a user could take a valid reset link for their own account and substitute a different user ID.
When to use it. A good fit when you want to avoid shared database state across nodes, for microservice architectures where the service handling the reset request has no direct database access, or when you need to generate reset links programmatically at high volume. Not appropriate where revocation is a hard requirement.
Approach 3: The short-lived OTP or PIN
The URL-in-email model breaks down in mobile applications where tapping a link in an email client reliably opens the correct in-app screen. Deep linking works in theory, but in practice varies by device, mail client and OS. The OTP (one-time password) approach sidesteps this: send a numeric code, have the user type it into the app.
How it works. Per OWASP, the PIN is a 6–12 digit number sent via SMS, email, or an authenticator-style side channel. The user enters it directly into a form field alongside their email. The server validates it, creates a short-lived session token scoped only to the reset operation, and lets the user proceed to set a new password.
The limited session is important. You are not logging the user in. You are issuing a single-purpose credential that can only call one endpoint: POST /reset-password. Everything else returns a 403. When the password is set, the limited session is destroyed.
// OTP-based reset: validation step
use Illuminate\Http\Request;
use Illuminate\Support\Facades\Cache;
use Illuminate\Support\Facades\RateLimiter;

Route::post('/verify-reset-otp', function (Request $request) {
    $request->validate([
        'email' => 'required|email',
        'otp'   => 'required|digits_between:6,8',
    ]);

    $key = 'otp_attempts:' . $request->ip() . ':' . $request->email;

    if (RateLimiter::tooManyAttempts($key, 5)) {
        return response()->json(['message' => 'Too many attempts.'], 429);
    }

    $stored = Cache::get('reset_otp:' . $request->email);

    if (!$stored || !hash_equals($stored['code'], $request->otp)) {
        RateLimiter::hit($key, 300); // 5-minute window
        return response()->json(['message' => 'Invalid or expired code.'], 422);
    }

    if (now()->timestamp > $stored['expires_at']) {
        Cache::forget('reset_otp:' . $request->email);
        return response()->json(['message' => 'Code has expired.'], 422);
    }

    Cache::forget('reset_otp:' . $request->email);

    RateLimiter::clear($key);

    // Issue a limited session - scoped to reset only
    $resetToken = bin2hex(random_bytes(32));

    Cache::put('reset_session:' . $resetToken, ['email' => $request->email], now()->addMinutes(10));

    return response()->json(['reset_token' => $resetToken]);
})->middleware('throttle:10,1');
The hash_equals call is essential. Never compare OTP codes with ==. The function uses constant-time comparison, same principle as crypto.timingSafeEqual in the TypeScript example above.
Rate limiting on the verification endpoint is non-negotiable. A 6-digit code has one million possible values. Without a hard attempt limit, it is brute-forceable.
When to use it. Mobile-first applications where deep linking is unreliable, SMS-based identity verification flows, or when the user experience explicitly calls for a “type this code” interaction. The attack surface is slightly wider than a long random URL token because the code space is smaller, so the rate-limiting layer carries more weight.
The expiry question: why 15 minutes, not 60
The three approaches above all need an expiry window. Here is how to reason about it.
A password reset link is a temporary credential. The threat model is: the email account is compromised, or the email is visible in transit, or the user sent the request from a shared device and then walked away. In each case, the question is how long the attacker has.
Shorter is always more secure. The cost of making it too short is that a user who takes ten minutes to check their email then navigate to the link gets an expiry error. The fix is a well-designed “expired link” page that lets them re-request immediately, not by increasing the window.
A 60-minute window made sense when network speed and email delivery were inconsistent. Modern email infrastructure typically delivers within seconds. A 15-minute window covers legitimate use cases (slow email clients, interruptions) without leaving the credential alive for an hour.
Twenty minutes is a reasonable production default. Use 15 if your threat model is high-risk. In Laravel the setting is 'expire' => 15 in config/auth.php. Do not set it to 24 hours because it is more convenient for testing.
The cleanup work every approach shares
Whichever design you choose, three things need to happen after a successful reset.
Invalidate all existing sessions. OWASP’s guidance is to ask the user whether they want this, or do it automatically. In practice, invalidating automatically is safer and users rarely object. In Laravel, Auth::logoutOtherDevices($password) handles this, or you can delete all Sanctum tokens for the user: $user->tokens()->delete().
Send a confirmation email. Notify the user that their password changed. This is the only signal they have if an attacker reset their password without their knowledge.
Clear the token row. For database-backed approaches, delete the token on successful use. Do not wait for the scheduled cleanup. A token that has been redeemed should not be redeemable again.
Which one to reach for
The decision comes down to three questions.
If you need server-side revocation, meaning the ability to invalidate a sent link before it is used, the only option is the database-backed URL token. It is also the safest default for anything where the Approach 1 overhead is acceptable.
If you are building on a distributed architecture and want to avoid shared database state for the reset flow, the HMAC-signed URL is the right fit. Accept that you cannot revoke links once sent, and set your expiry window tighter to compensate.
If your users are on mobile or if the flow explicitly calls for code entry rather than link clicking, the OTP approach works. The rate-limiting layer is critical: the smaller code space means the implementation has to make up for it in brute-force resistance.
One thing all three approaches share: none of them use JWT as the reset credential. OWASP explicitly flags this, and the reason is simple. A random token derives its security from entropy. A JWT derives its security from a signing key. If that key is compromised, every JWT ever issued for any user is now forgeable. The blast radius is too wide for a reset flow to carry.
The feature is simple. The decision space is not.